As a consultant to the home building industry, I help builders identify and correct construction problems that can cause defects or costly callbacks. One of the more common areas where callbacks are a concern is drywall. Nail pops, cracking, or ridging in their walls and ceilings are the kind of thing that homeowners notice and complain about, and some builders are plagued with that sort of callback.
Most cosmetic issues with drywall are caused by movement:
- Structural movement related to framing (due to inadequate engineering or poor framing techniques)
- Thermal movement related to installation conditions (expansion and contraction of building materials due to temperature differences)
- Hygrometric movement related to finishing conditions (movement due to elevated moisture content of framing lumber and drywall)
All of these issues are under the builder’s control, at least to some extent. So with an understanding of the source of the problem, builders can prevent, or at least reduce, those callbacks. Here’s a look at where some of the most common drywall problems begin.
Wall Bracing
Some production builders are so focused on cost that they reduce the structural wood panel sheathing on their buildings to the bare minimum required by code. The result is a structure that is less stiff than if they fully sheathed the entire exterior of the building. A partially sheathed building may not fall down, but it does flex more than a fully sheathed building under wind loads. That can cause the drywall to crack. Fully sheathed buildings are stiffer, and they have fewer drywall problems.
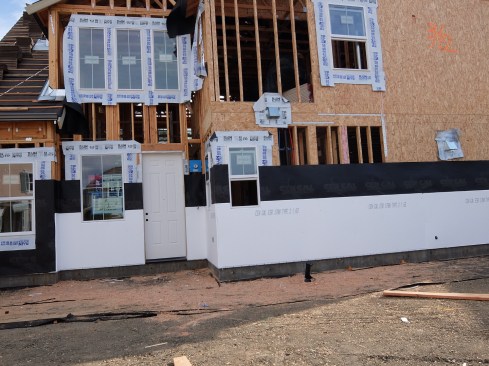
Note how this home does not have continuous shear wall panels.
Loading the Building
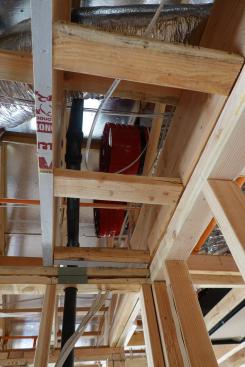
It’s important to have the major structural loads in place before drywall is applied. For example, roof shingles should be installed, or at least evenly loaded onto the roof, before applying wallboard. Large heavy items such as bathtubs should be in place before drywall is applied. If there’s heating and cooling equipment installed in the attic, that should also be in place before drywall is finished.
Load Paths
Drywall joints on built-up posts that carry heavy point loads are prone to cracking. Instead of breaking the butt joint on a column, break the drywall joints elsewhere on the wall.
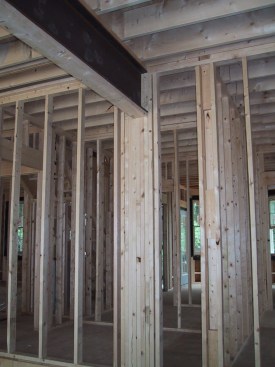
Don't create butt joints on built-up carrying posts like these (above). Instead, position drywall sheets to span over those posts (below).
Below is a good example of a sheet of wallboard placed so that it spans a carrying post. The joint will also be located well away from the corners of the window rough opening (see discussion below).
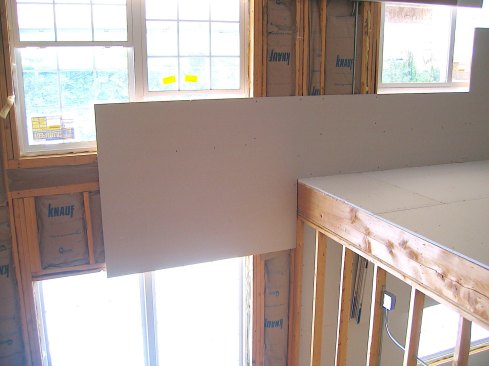
Note how the gypsum panel spans over the load pathways.
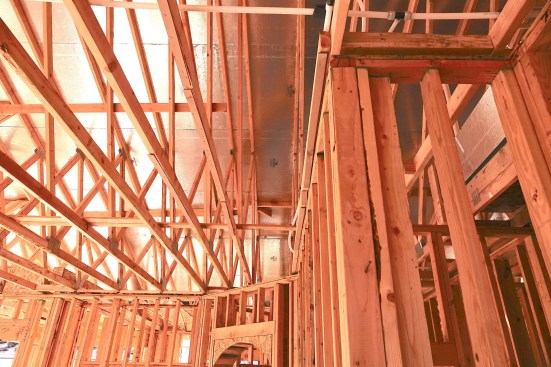
Tall Walls
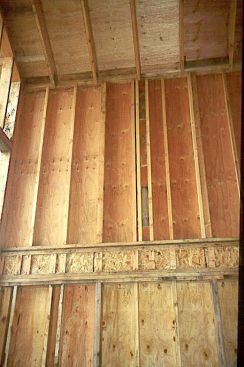
In modern homes, it’s common to find open, two-story spaces such as foyers. The photo below shows a typical way of framing those tall walls, with a floor joist between the upper and lower wall frames. In this example, the joist is a wood I-joist. That’s better than using sawn lumber: Solid wood shrinks most in the cross-grain direction, and a sawn lumber joist at this location can shrink a half-inch, creating crushing at the joint as shown here. With wood I-joists, shrinkage is minimal in all dimensions, and crushing is less likely.
Window and Door Openings
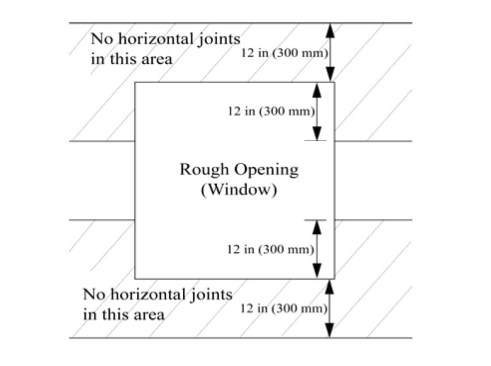
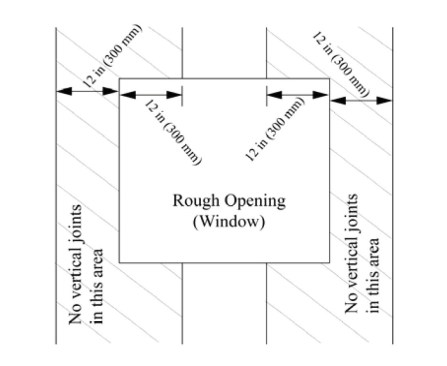
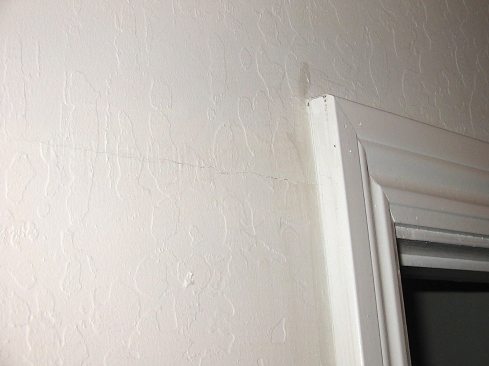
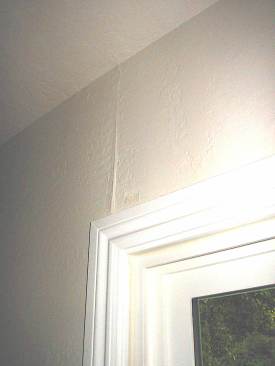
Walls experience a lot of stress at the corners of window and door openings. For that reason, industry standards recommend locating drywall joints at least 12 inches away from the corners of any rough opening (see drawings). In the photos here, you can see how the drywall joints have cracked where the joint occurs just a few inches from the corner.
Wall-to-Ceiling Joints
Cracks often occur at the corners where walls meet ceilings. This is caused by lumber shrinkage and a rigid attachment of the drywall to the framing at the corners. Instead of fastening the drywall to the wall plates, industry guidelines recommend holding the fasteners back 7 inches on the ceiling and 8 inches on the wall to allow the drywall to float in the corners (see drawings). In cases where the ceiling framing is parallel to the wall, rather than use a nailer fastened on top of the wall plate, the guidelines recommend installing blocking as needed between the nearest ceiling member and the wall so that fasteners can be placed at the recommended distance from the wall. The photos here show fasteners placed close to the corners—a common practice, but not recommended.
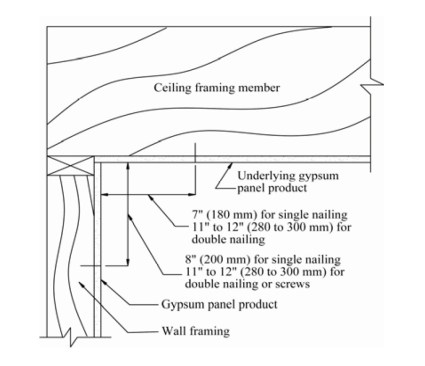
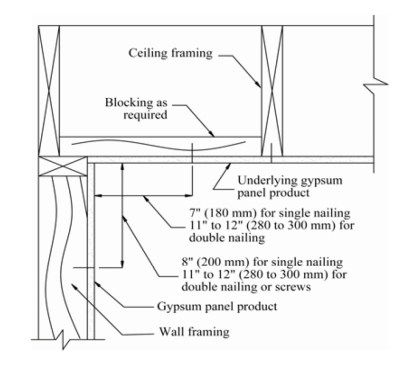
Nailers at the edge of ceilings (above) don't allow drywall installers to hold fasteners back from the corner. Instead, install blocking as shown below.

Fasteners placed tight into wall and ceiling corners may cause cracking in the corner. Instead, hold fasteners back to allow the corners to float.
It’s wise to avoid using small strips of drywall next to a corner (as shown below), because it doesn’t allow you to fasten far enough from the corner to allow the drywall to flex. Good integrative design would have been helpful in this case: Builders should have a conversation with their designers about dimensioning rooms so that full sheets of material will fit the space. (Do you really need that extra 5 inches in the room width here?)
Long Spans
Modern buildings often have wide rooms with long ceiling spans. In those cases, drywall ridging or cracking near the center of the room is a typical callback. I recommend that builders consider using resilient channel in those large rooms, or anywhere that a long span and a short span occur next to one another. Resilient channel takes up the stresses of differential movement in adjacent members, and allows the framing to flex without transmitting stress to the drywall.
Belly Bands
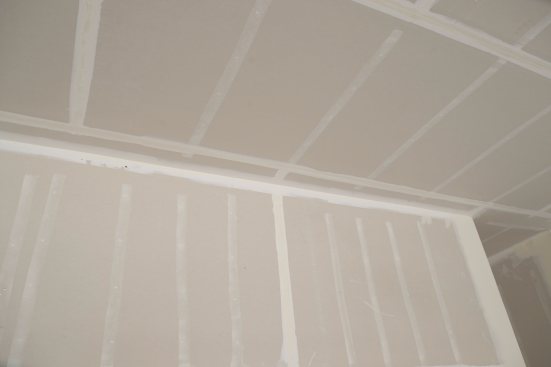
In higher-end homes, 9- or 10-foot wall heights are common. In that case, 4-foot drywall sheets don’t break evenly at the top and bottom of walls: A rip is required to completely cover the wall. Some installers will place one sheet all the way to the wall top, place one sheet all the way to the bottom, and cut the rip to fit the middle, creating what’s known as a “belly band.” But that’s not good practice, because it requires butting a ripped edge to a tapered edge, creating a bump halfway up the finished wall. Instead, place the rip at the bottom of the wall as shown here. This allows you to make all your joints with tapered edges on both sides.

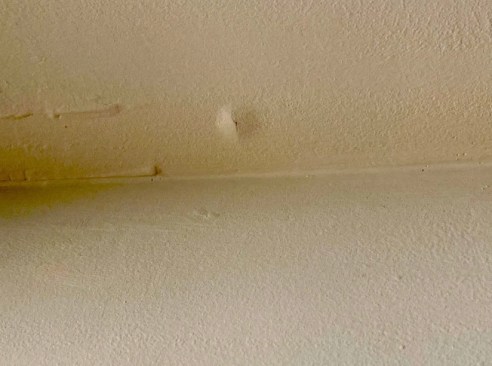
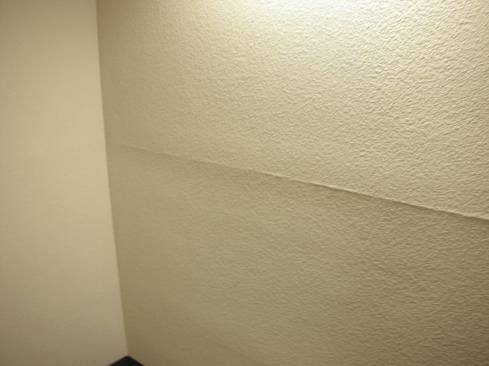
The image below shows ridging of a horizontal joint at mid-wall height. This could be caused by lumber shrinkage due to the use of wet lumber, or it could be an example of ridging caused by butting a ripped edge to a tapered edge. Either condition is preventable, either by keeping the lumber dry or by making sure to butt tapered edges together.
Application Conditions
Gypsum wallboard, like other construction materials, is sensitive to temperature and moisture. For good results, it’s important to control the environmental conditions where drywall is installed and finished. Temperatures in the building should be 40 degrees Fahrenheit or warmer for hanging drywall, and 50 degrees or warmer for adhesive application, as well as for taping and finishing. After the drywall is installed, maintain temperatures at 50 degrees or warmer.
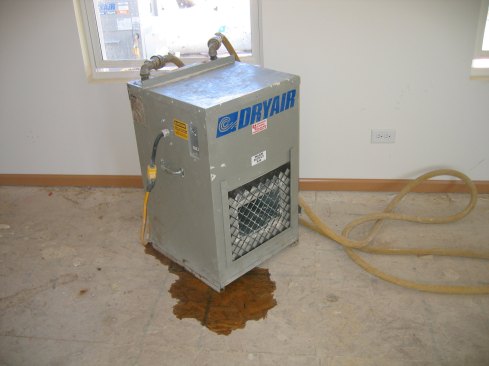
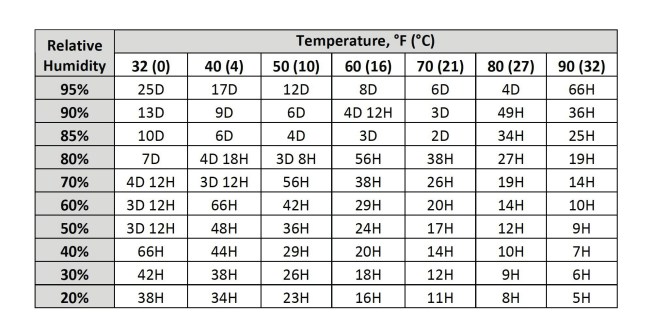
Temperature and humidity affect the time that it takes for a coat of drywall mud to dry. The chart below indicates the time required for a range of temperature and humidity conditions. Some builders use portable propane-fueled salamander heaters for temporary heat, but it’s important to realize that propane combustion releases 7.8 pounds of water for every gallon of propane burned, and will significantly increase the relative humidity in the building. It’s better to use dry heat such as the equipment shown here. When using temporary heat, make sure to apply it evenly throughout the building.
Sometimes builders will install drywall on the ceiling under the attic, then immediately come back and start taping and finishing. But it’s important to insulate the ceiling as soon as drywall is installed. If you don’t insulate before taping, there can be a big temperature gradient across the drywall between the conditioned space and the unconditioned attic, which is an invitation for trouble.
Condition of framing materials can have a huge impact on callbacks. If lumber is stored on the jobsite and and not protected from the elements, elevated moisture content can result in excessive shrinkage if the drywall is installed before the lumber has had time to dry out. I never like to see framing lumber above 13% to 14% moisture content.
Home moisture levels are a wild card. Many times homeowners have elevated levels of moisture in the home due to perceived comfort and lifestyle. Always bring a digital hygrometer and measure the relative humidity of the occupied spaces to see if the issues are caused by the homeowner over-humidifying the home. For example: I visited one callback where the homeowner who was experiencing drywall issues had a 500 gallon aquarium in the living room. If you spot condensation on low-E windows under moderate outdoor temperatures, that’s a hint that the home is over-humidified.
Low-VOC Adhesives and Screw Pops
A few years ago, the drywall industry received a rash of complaints relating to nail pops and “screw buttons” (bumps or protrusions forming over the heads of screws in finished drywall). USG undertook a field and laboratory study of the situation and traced the problem to the use of low-VOC adhesives. The results of the investigation are published in a white paper, “USG Fastener Related Drywall Installation Issues and Recommendations.”
USG determined that water-based low-VOC adhesives were shrinking as they dried, pulling the drywall closer to the framing members and causing bumps to form at screw locations. To address the problem, USG offered two recommendations: Either give the adhesive time to dry, then go back and reset drywall screws to make sure they don’t protrude above the paper face of the wallboard; or just stop using low-VOC adhesives.