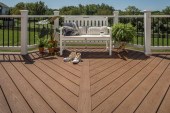
There’s no doubt that an automatic pool cover is worth the up-front investment. Because it’s a cover, it enhances safety and saves energy. Because it’s automatic, it’s as convenient as you can get.
But the cover greatly affects the overall look of the pool. The cover box, track, and lead bar will leave unattractive evidence of the device, even when it’s not being used.
Many high-end customers only want to see the cover when it’s closed. So Paul Benedetti, principal of Aquatic Technology Pool & Spa in Morgan Hill, Calif., developed a variety of tricks to conceal the cover from view. Here are a few of his tips.
Use an in-wall receiver. Until recently, cover tracks could only be mounted on the coping’s underside, which limited the designer’s choices. Builders could only use coping that cantilevered enough to accommodate the track and was thick enough to accept a 1½-inch screw.
Now builders can install the cover’s track in the pool wall itself, using an in-wall receiver. This pre-manufactured channel attaches to the top of the bond beam and holds the track in place. With this system you can choose whatever coping you like.
Set the track before installing the tile line. Extend the receiver about 6 inches past the pool wall, so the cover installers have enough room to slide the track and end pulley under the coping. Ultimately, the track will need to sit flush with the tile, so make sure it protrudes far enough out so everything aligns properly. Then set the coping.
In these applications, installing the in-wall receiver is more challenging. You can’t just bolt it to the top of the bond beam but need to embed it in the gunite. Figure out the exact elevation for the receiver ahead of time to ensure that the track lines up on both sides of the pool. Then secure it to the steel on the raised wall so it doesn’t move during the gunite phase. Regular tie wires won’t work because the receiver is too heavy. Benedetti uses the horizontal flange in the back of the receiver to steady it. He has his crews drill holes in the flange, put threaded stainless steel rods through the holes, then sandwich the flange with nuts and washers. Then the rods must be bent over so they can be tied and electrically bonded to the steel. This ensures the receiver won’t move. Also be sure to put tape over the channel so it doesn’t get clogged with gunite.
Use masonry lids. Many high-end clients want an alternative to the metal lids that have traditionally been installed over cover boxes. The lids don’t match the deck material and they waste space, since you can’t walk on them.
The trays are supported by brackets resembling the ones used for shelving. They should be mounted on the back wall of the cover box and spaced every couple of feet apart. The rolled-up cover sits underneath the brackets.
When matching a cover lid to a flagstone deck, have the masons continue placing the material over the cover box in the same pattern. They can do this by setting all the trays in place and simply laying the material over it. Then they can saw cut joints between the masonry trays underneath. Now you have a flagstone surface that can be easily removed one tray at a time. From a distance, you may not even see the joints.
If Benedetti uses a coping, he’ll put it on the front edge of the trays, then cover the rest of the box with the deck material.
Whatever finish you choose, be sure to leave a joint between the box and the deck, so they can move independently.
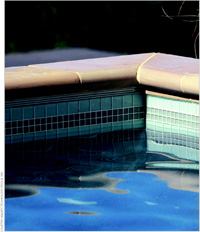
Now, the only evidence of the cover box is the front of the trays: From inside the pool, you can see a silver line underneath the coping. You can hide this, too, by notching the coping material so it will hang over the trays. Benedetti creates notches ¾ to 1 inch deep, so the coping will fit nicely over the ½-inch-thick tray.
Hide the lead bar. The metallic lead bar, placed at the front edge of the cover to help thread it in the track, is the last unsightly detail. When the pool cover is open, the bar sits in front of the box, so you can see it peeking out from under the lid. With the cover closed, the bar sits right at the coping. It’s a minor issue, but enough to irritate some clients, Benedetti says.
The notch is 2 inches deep so it’s level with the waterline. (On cover installations, Benedetti always lowers the water level 2 inches so it doesn’t spill into the box. He also moves the skimmer down to match..
Benedetti also drops the lead bar so it will fit under the coping when the cover is closed. He uses the brackets that mount the bar to the track to control its elevation. Installing the brackets upside down lowers the bar slightly, so it will tuck underneath the coping rather than bump into it.