You know a door has been installed properly if it repels wind and water, opens and closes smoothly, locks and unlocks effortlessly, and most importantly, it keeps performing for decades without needing the slightest adjustment. Every successful exterior door installation starts with the sill. Here, Marvin’s Master Installer Eric Klein gives seven pro tips to help you prep the sill in a rough opening so you can walk away from your next install confident that if you do get a call-back, it will be from the customer asking for more of your services.
1. Replace rotten wood
When replacing a door, it’s not uncommon to find that the sill has water damage and is badly deteriorated. Replacing or patching a rotten section of subfloor is not an easy task, but installing a new door on an unstable surface is a callback waiting to happen. A door requires a solid substrate running the entire length of the opening, and creating a proper seal will be difficult if not impossible especially if the rot continues to spread. Also, deteriorated wood will not provide holding strength if the door requires through-sill screws to secure it.

2. Create a flat, level surface
It’s important that the sill is level and that all humps and sags are eliminated. Installing a door on an uneven sill can cause the slab to bind, reduce the effectiveness of the weather stripping, and produce latching and locking hardware misalignment. Straightening a sill with standard shims is not the best solution because individual shims don’t support the entire door sill and the gaps between shims are susceptible to air, water, and insect infiltration. Layer-shimming, or trimming and stacking lengths of sill shim until the sill is level, is the best way to create a flat level surface.
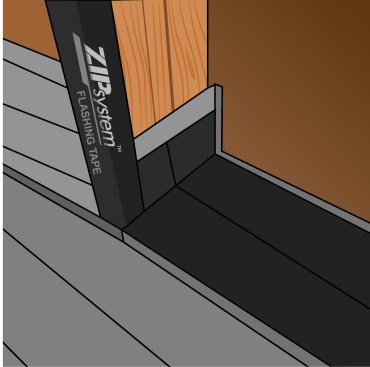
3. Install Flashing
Prep the sill in a door opening similarly to the way you would a window opening. Install a membrane or pan flashing that protects the sill, the bottom of the jack studs, and if possible, the face of the sheathing. Many door instruction manuals exclude this step, but it makes sense to include it on your next install.
4. Apply the proper sealant or adhesive
Applying sealant under a door sill helps prevent water and air infiltration, but sills on some larger doors require the strength of adhesive to keep them in place. If the door manufacturer does not recommend a specific type, apply an exterior grade sealant/adhesive that does not shrink, is compatible with the surfaces it’s being applied to, and will work in cold or moist conditions if necessary.

5. Pay attention to the sealant pattern
Using the proper sealant is a good start, but the way it’s applied is also important. If the door instructions don’t specify exactly how to apply the sealant under the door sill, consider a pattern like the one above with an interior bead, an interior to exterior bead ½” from the end of the rough opening, a 1-2” gap in the exterior bead and a wavy center bead. This pattern creates a back dam to prevent water from reaching the finished floor but also provides an exit route for water if/when it does find its way in. Always have an assistant help place the door into the opening so it can be carefully set on the sealant without smearing the pattern.
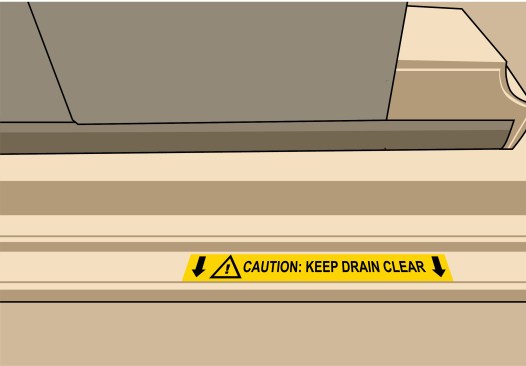
6. Don’t plug weep holes
Many doors are equipped with weep holes. Too often, these holes are accidentally covered by caulking and sometimes even purposely sealed shut by conscientious but inexperienced siding installers. If a door has weep holes but has no warning label indicating their location, create one with a marker and small strip of masking tape so the siding crew will know not to plug them.
7. Follow the instructions
A lot of thought, science and testing goes into creating installation guidelines. It may sound like obvious advice, but when installing a frequently used and expensive product like a door, it doesn’t make sense to take shortcuts. Occasionally, a particularly thorough building inspector will want to review the manual to ensure the door was properly installed, and in the unlikely event of a performance issue, the best way to cover yourself is to follow the installation instructions to the letter.
Want more from the “Minnesota MacGyver”? Get window installation tips on the Marvin blog.