To ensure that we get as close to 100 percent compaction as possible, we run our walk-behind plate compactor over the crushed stone until the machine “hops,” which indicates that the stone is completely compacted. (To see how this feels, run the compactor for a second or two on a solid surface, like an asphalt roadway; since the compactor cannot tamp this surface any further, it will “hop.”)
Dealing with drainage. Water trapped behind or under a wall can move the wall by hydrostatic pressure as well as by frost heave. Dry-stacked stone walls naturally allow water to weep out from the wall face, but we also provide drainage with perforated 4-inch pipe wrapped in landscape fabric and placed at the base of the wall.
In most cases, we run the pipe to daylight away from the wall, but if we don’t have the necessary pitch, we’ll run the pipe to a dry well located a good distance from the wall. Pipe is not critical with most stone walls because there is plenty of room for water to weep through. But since this type of pipe is so inexpensive, it never hurts to use it.
Because a retaining wall has to withstand the pressures of the slope it is retaining, we typically dig the area behind the wall back to its angle of repose—the angle at which a slope is self-sustaining for a given type of soil. This angle is heavily dependent on the soil type but, as a very loose rule, it averages about 45 degrees.
With the final height of this poolside wall as our guide, we dug into the slope so that the bottom of the cut was 2 feet back from the back surface of the wall (to allow for crushed stone at the base of the wall). The distance from the top of the wall to the cut line was 2 feet plus the height of the finished wall.
After the excavated slope was covered with landscape fabric, all of this excavated area was filled with #2 crushed stone (a large crushed stone of up to 2 inches in size) to allow for drainage.
In cases where plantings will be used, we usually backfill to within about 12 or 18 inches of the top, lay down another layer of landscape fabric to keep the soil from filtering down into the crushed stone, and then fill in with topsoil.
Laying up the wall. We keep three basic principles in mind when building with stone: battering, through-stones, and “1 over 2, 2 over 1.”
Like most of our retaining walls, this wall was battered back approximately 10 percent, or about 1 inch per foot. To achieve consistency in battering a curved wall, we use a spirit level to check the plumb as we build up. But there’s no substitute for experience, and we eye the wall a lot to be sure it looks right.
But we did create benches in the wall that serve a similar function; we placed the 6-foot-long slabs of stone so that they would project about 18 inches from the face of the wall. Each bench is like the proverbial tip of the iceberg; with more than 4 feet of stone buried in the wall and the gravel beyond, you can be sure that these seats will not move.
On taller walls, we’ll occasionally use geogrid—a netlike landscape textile—to separate the soil layers and to tie the wall to the slope, much as a deadman does. Geogrid is commonly used with segmental block retaining walls. While we didn’t use it for this short wall, it’s relatively inexpensive and a lot less costly than rebuilding a wall.
As the wall goes up, we’re careful to lay up stones so that their longest edges project into the wall—rather than orienting them parallel to the wall’s face—even when the stones have especially clean and beautiful faces. This technique results in a stronger wall.
When we build our walls, there is always rubble left over from cutting or breaking rock. We use this “waste” as infill, tightly packing the rubble behind the face of the retaining wall. And we place the infill carefully—rather than just tossing it in—so that it doesn’t settle over time. We also use pieces of rubble to shim the face stones into position, leveling them and locking them in place.
Coping. The most common way to cope—or cap—a wall is to select stones large enough to span the wall’s width. Then the stones must be carefully cut to fit, leveled, and placed on top of the wall. The tighter the fit, the less water these coping stones will allow into the wall.
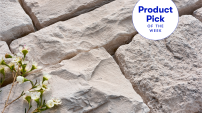
We often use flagstone to cap our stone fences and retaining walls (see photo at left). Ranging in thickness from about 1½ to 3 inches, flagstone (sometimes called “stand-up” because it’s stood up on pallets as it’s quarried) is typically used for paving pathways, walkways, and patios. We buy it by the tractor-trailer load; when we take delivery we separate out the really thick pieces and save them for coping stones. Since short retaining walls are invariably used as seating, we make sure the caps are large and stable. Indeed, their smooth, consistent surface makes for a nice seat-wall or tabletop.
We usually use shim-rocks to level up coping stones as we place them, but we sometimes use mortar too; we place it in such a way that it does not show along the face of the fence or between the coping stones. Although the mortar separates from the stone over time, it still acts as a perfectly formed shim stone, supporting the decorative coping stones.
To build this wall, we used about 18 tons of Colonial Wall Stone, 5 cubic yards of crusher run base, 1,000 square feet of landscape fabric, and roughly 23 cubic yards of #2 crushed stone. Labor time was about 130 man-hours, and the total installed price was approximately $11,000. —Bruce Zaretsky is owner of Zaretsky & Associates, a design/build firm based in Rochester, N.Y. This story first appeared in THE JOURNAL OF LIGHT CONSTRUCTION.


